[Windows 10] How to go through Windows initial setup
* Operating methods will vary depending on the account you are creating
Applicable Products
Windows 10
Explanation
When starting up VAIO for the first time, follow these directions to complete the initial setup, so that Windows can be used. Initial setup will also be needed when recovery is performed.
As an operation of Windows initial set up, you will create an “account” to be able to sign in to the PC (in order to use the PC). With Windows 10, you can sign in using either Microsoft account or local account. Operational procedures will vary depending on which account you will use to sign in at the initial setup.
Table of contents
To be checked in prior
Operational procedures
If you have internet connection
If the PC owner is an individual
If the PC owner is an organization
If you do not have internet connection
To be checked in prior
Caution
In order to maintain the system’s stability, please perform Windows Update, once the initial setup is complete.
Operating methods
Caution
When creating a Microsoft account, prepare a valid email address, and go through the setup by connecting to internet.
You can sign in through local account, without creating Microsoft account. If you do not have access to the internet, please create a local account.
Even if you signed in using local account during Windows setup, you can switch to Microsoft account by connecting to the internet after setup is complete.
If you have internet connection
If the PC Owner is an individual
Operational procedures
- [Hi there] screen will be displayed, so enter the following items, and select [Next] button.
- What’s your home country/region?
- What’s your preferred app language?
- What keyboard layout would you like to use?
- What time zone are you in?
- If the wireless LAN connection screen displays “Connect”, click on “Skip this step”.
When logging in by Microsoft account, either connect with wired LAN or set up wireless LAN connection. - [Here’s the legal stuff] screen will be displayed, so read the contents and select [Accept] button.
- [Get going fast] screen will be displayed, so read the contents and select [Use Express settings] button.For Windows 10 Home, after this, it will move to Microsoft account setup screen (procedure 7).
If you select [Customize settings], it will move to [Customize settings] screen (procedure 4-1).
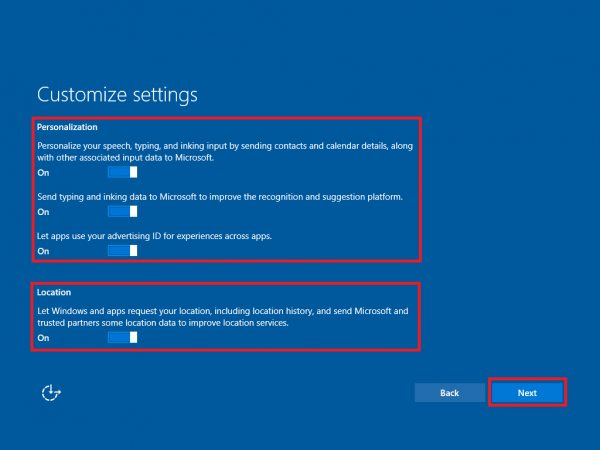
4.1. [Customize settings] screen will be displayed, so read the contents, setup the ON/OFF for [Personalization] and [Location], and select [Next] button.
4.2. Likewise, [Customize settings] screen will be displayed, so read the contents, setup the ON/OFF for [Browser and protection] and [Connectivity and error reporting, and select [Next] button.
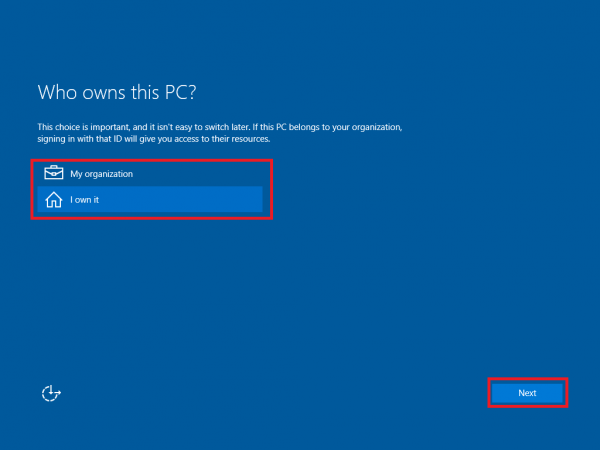
- [Who owns this PC?] screen will be displayed, so select [I own it], and select [Next] button.If you are not connected to the internet, it will move to [Create an account for this PC] screen (if you do not have internet connection).
Please refer to “If the PC owner is an organization “, if you have selected [My organization].
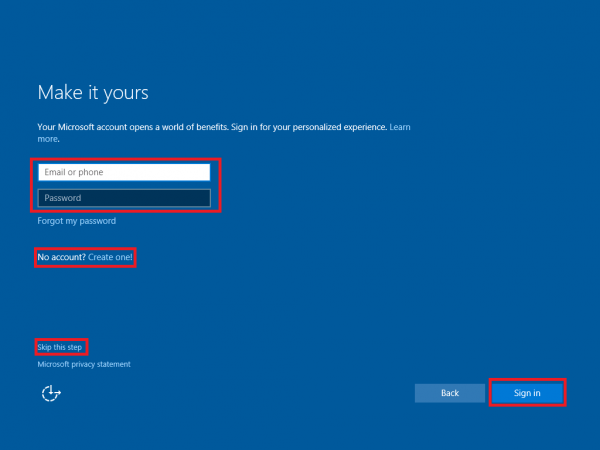
- [Make it yours] screen will be displayed, so enter the Microsoft account [email address] and [password], and select [Sign in] button.
Once completed, it will move to [Passwords are so yesterday] screen.If you do not have Microsoft account, please select [No account? Create one!]. It will then move to Microsoft account setup screen (procedure 7).
If you are not creating Microsoft account, select [Skip this step]. It will then move to [Create an account for this PC] screen (If you do not have internet connection (procedure 5)).
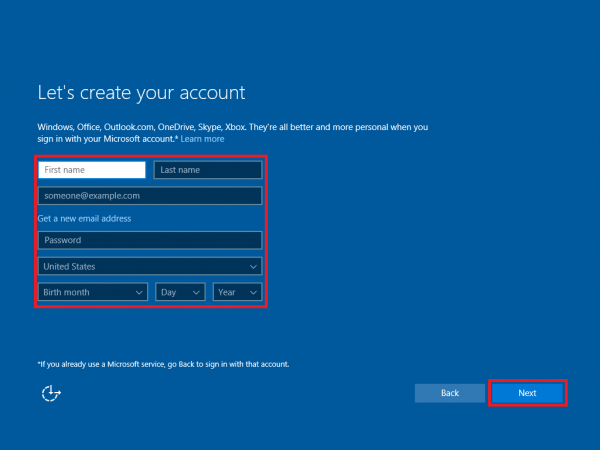
- [Create Microsoft account] screen will be displayed, so enter the following items and select [Next] button.
- name
- email address
- new password
- country
- birthday
- [Add security info] screen will be displayed, so enter the following items and select [Next] button.
- country
- phone number
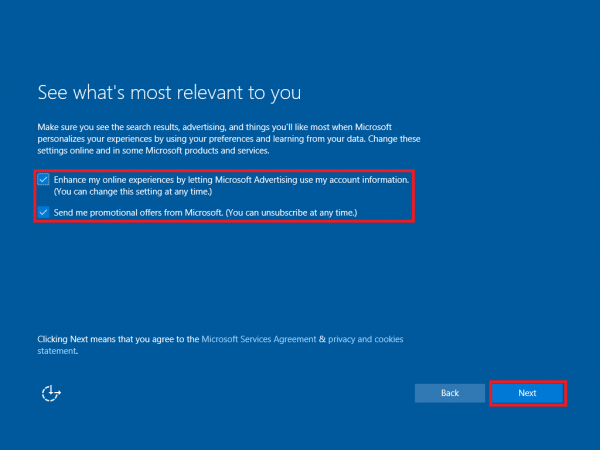
- [See what’s most relevant to you] screen will be displayed, so check whatever choices you wish, and select [Next] button.
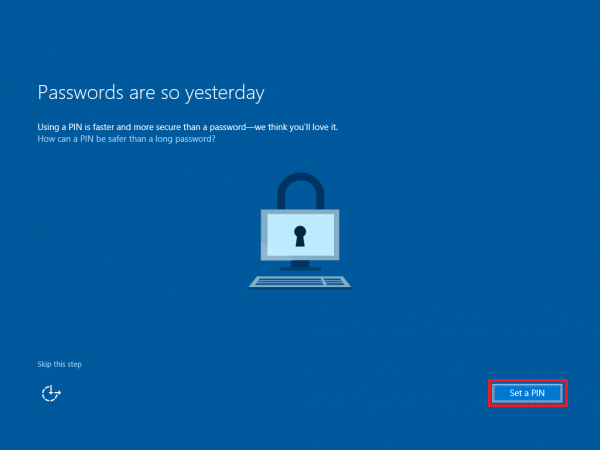
- [Passwords are so yesterday] screen will be displayed, so select the [Set a PIN] button.
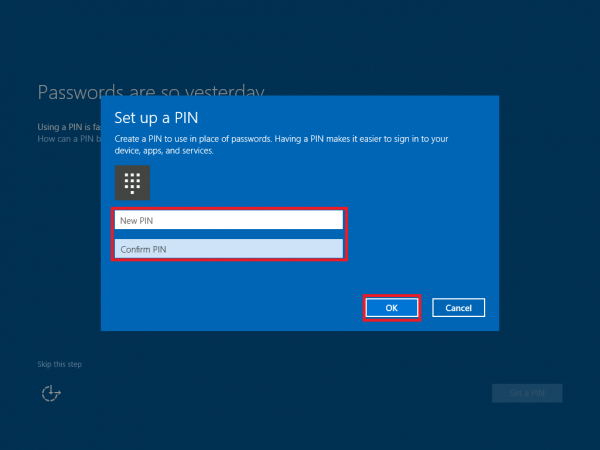
- [Set up a PIN] screen will be displayed, so enter the following items and select [OK] button.
- 4-digit New PIN
- Confirm PIN
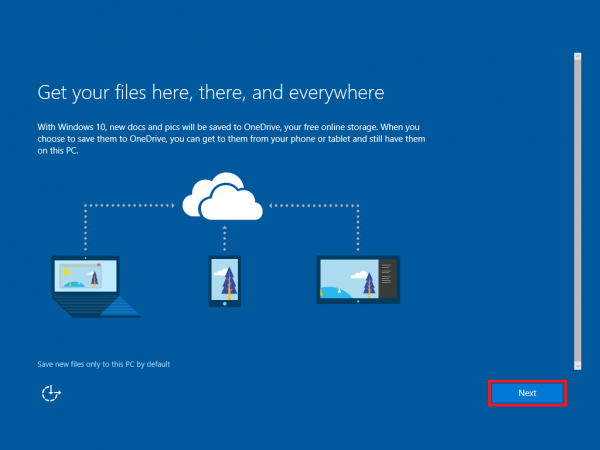
- [Get your files her] screen will be displayed, so select [Next] button.
- [Meet Cortana] screen will be displayed, so select [Next] button.
- [Networks] screen will be displayed, so select either of [Yes]/[No] buttons, depending on your choice.
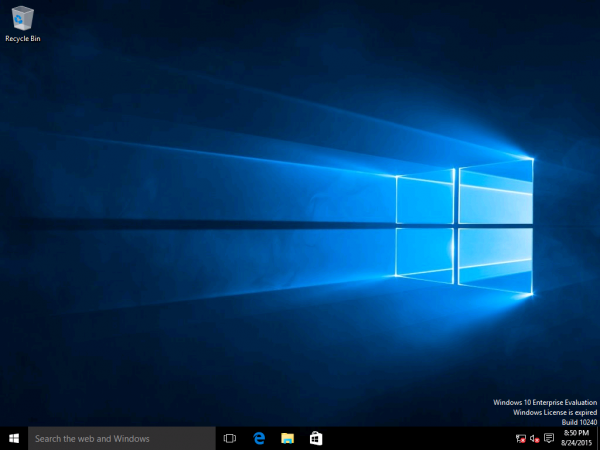
- [Desktop] screen will be displayed.
All setup operations are now complete.
If the PC owner is an organization
Procedures 1~4 are the same as the ones from “If the PC owner is an individual”
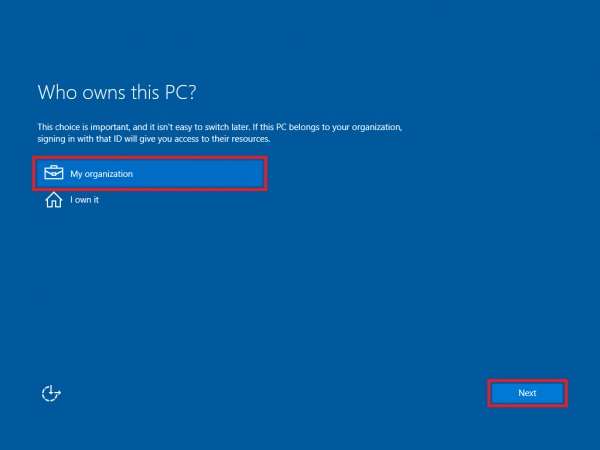
- [Who owns this PC?] screen will be displayed, so select [My organization], and select [Next] button.
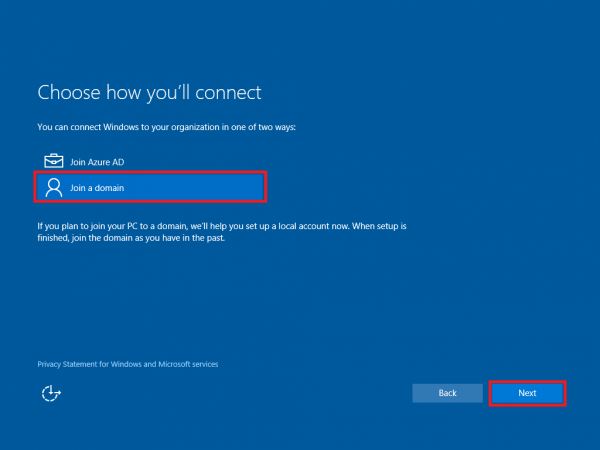
- [Choose how you’ll connect] screen will be displayed, so select [join a domain], and select [Next] button.
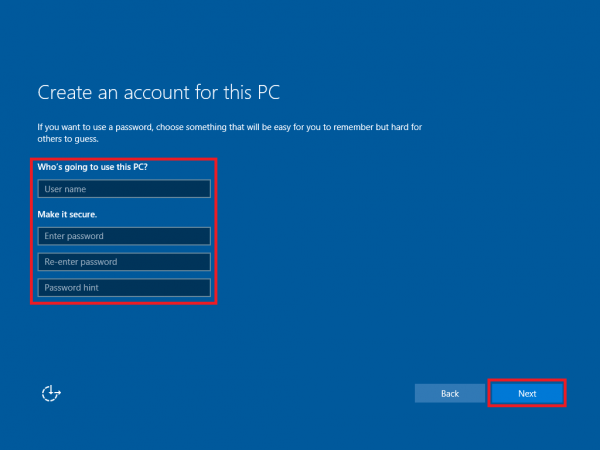
- [Create an account for this PC] screen will be displayed, so enter the following items and select [Next] button.
- PC’s user name
- PC’s password
- Re-entering password
- Password hint
- [Networks] screen will be displayed, so select either of [Yes]/[No] buttons, depending on your choice.
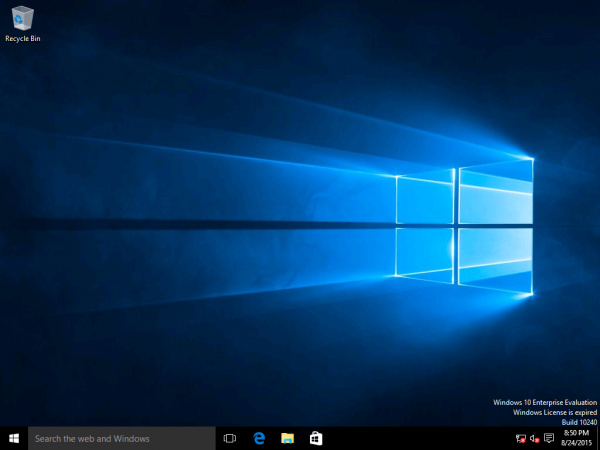
- Setup will be completed and [Desktop] screen will be displayed.
All operations are now complete.
If you do not have internet connection
Operational procedures
Procedures 1~4 are the same as the ones from “If you have internet connection”
- [Who owns this PC?] screen will be displayed, so select [My organization], and select [Next] button.
- [Login] screen will be displayed, so enter the password and login.
- Setup will be completed and [Desktop] screen will be displayed.
All operations are now complete.


