[Windows 10] How to change the user account name
[Windows10] how to change the user account name
Table of contents
Prior confirmation
Method of operation
If you are using a local account
If you are using a Microsoft account
If you do not know the type of user account that you have, you can use the following article to determine.
▼ Related Q & A:
[Windows10] about the types and differences in the privileges of the user account
Method of operation
If you are using a local account
1. Access the “Control Panel” screen.
▼ related Q & A: [Windows 10] “Settings” and how to display the “Control Panel” screen
2. Select “Change account type” under “User Accounts”.
3. While on the “Manage Accounts” screen, select the icon of the account that you would like to change the name for.

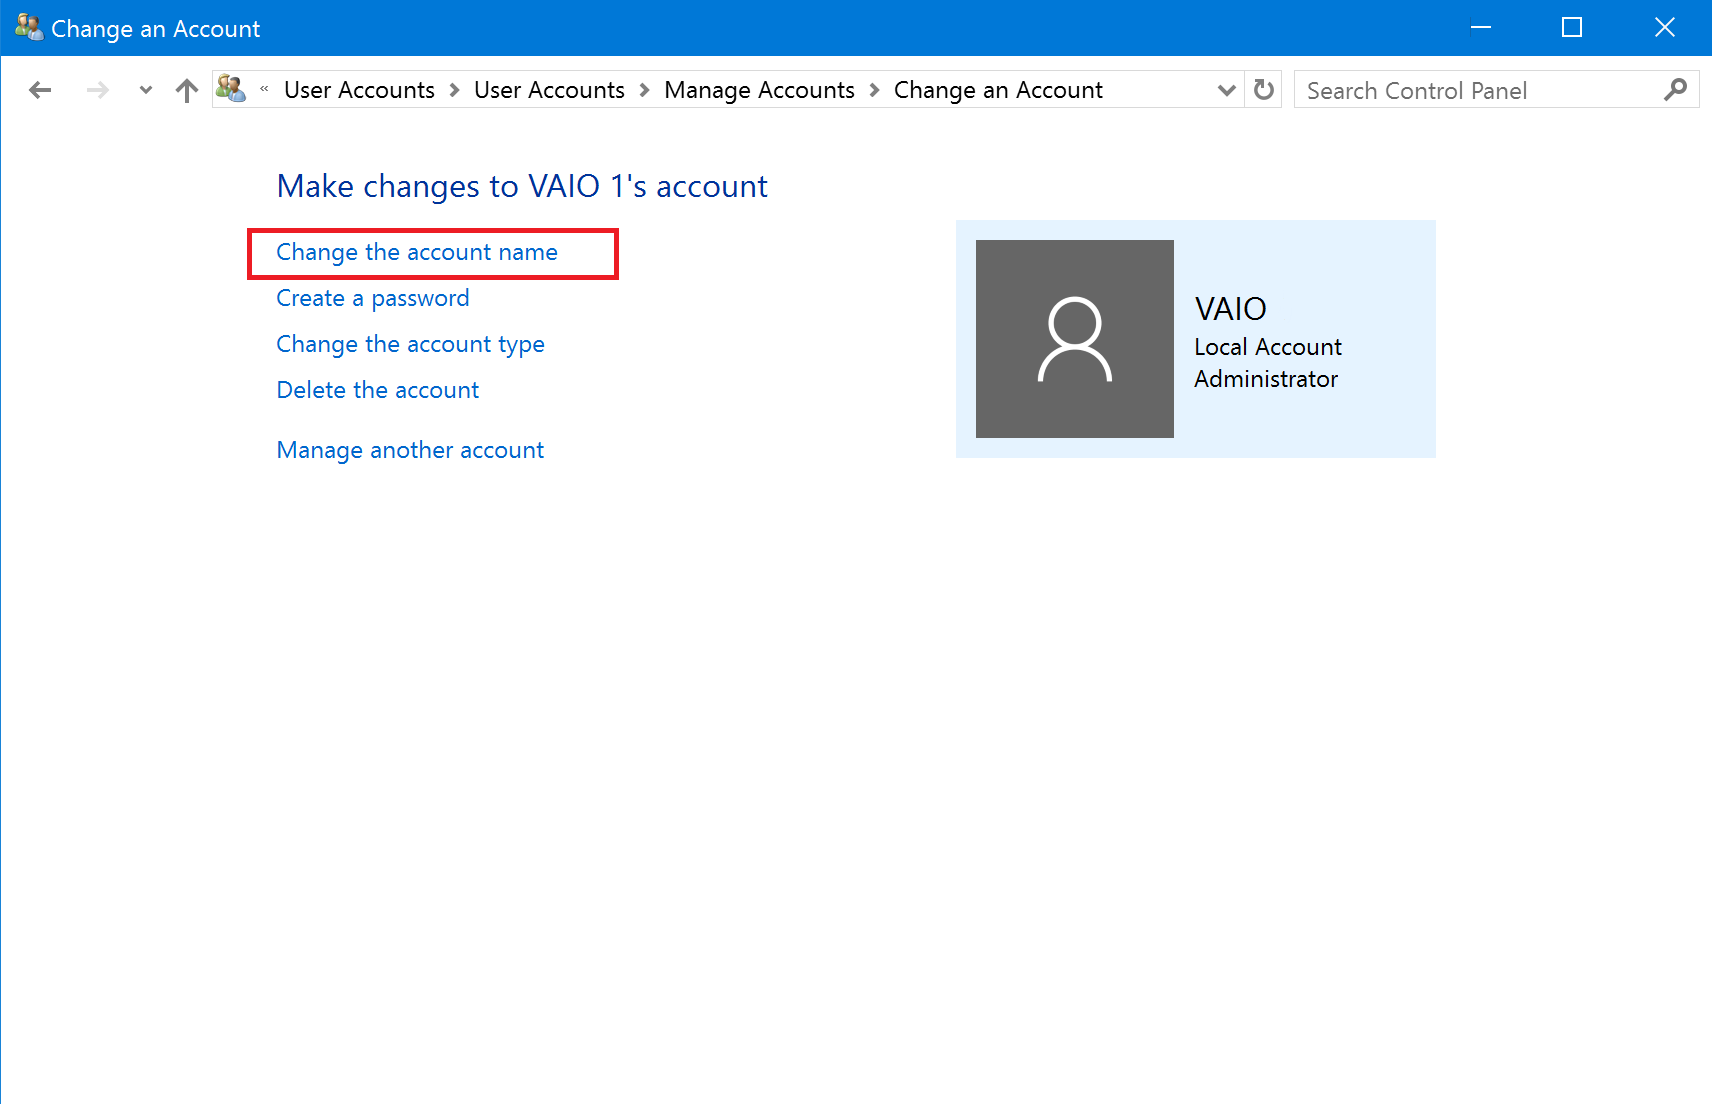
4. While the “Change an account” screen is displayed,click “Change the account name.”
5. Whie the “rename Account” screen is displayed, enter any name in the “New account name” field, and then select Rename.

This completes the operation above.
If you are using a Microsoft account
1. You will need to access the following Web page.
Sign-in to the Microsoft account: https://account.live.com
2. This will bring you to the [Sign in] page, enter your email address and password that you are registered with Microsoft account, and then select Sign In.
Depending on your settings, your email address may already be populated in the email field.
- If you have registered an incorrect e-mail address, you can sign in with the wrong e-mail address and password.

3. While the “home” screen is displayed, click the “Edit name” link and save any changes you make.

This completes the operation above.
After this, the name that appears on the upper right part of the Windows Store app on the Start screen will change.